Help Center Pages & Editing
Menu icons in one click
PICK ICONS in Edit Menu lets the platform choose an icon that fits each menu entry, for the entries without an icon or for every entry. You review the proposed icons in the rows and can change any of them; Save keeps them and Cancel keeps the icons as they were.
Watch it done: a short silent video with captions · 0:46. The steps below show the same thing picture by picture.
Before you start
- Log in to your website.
Let the platform choose the icons
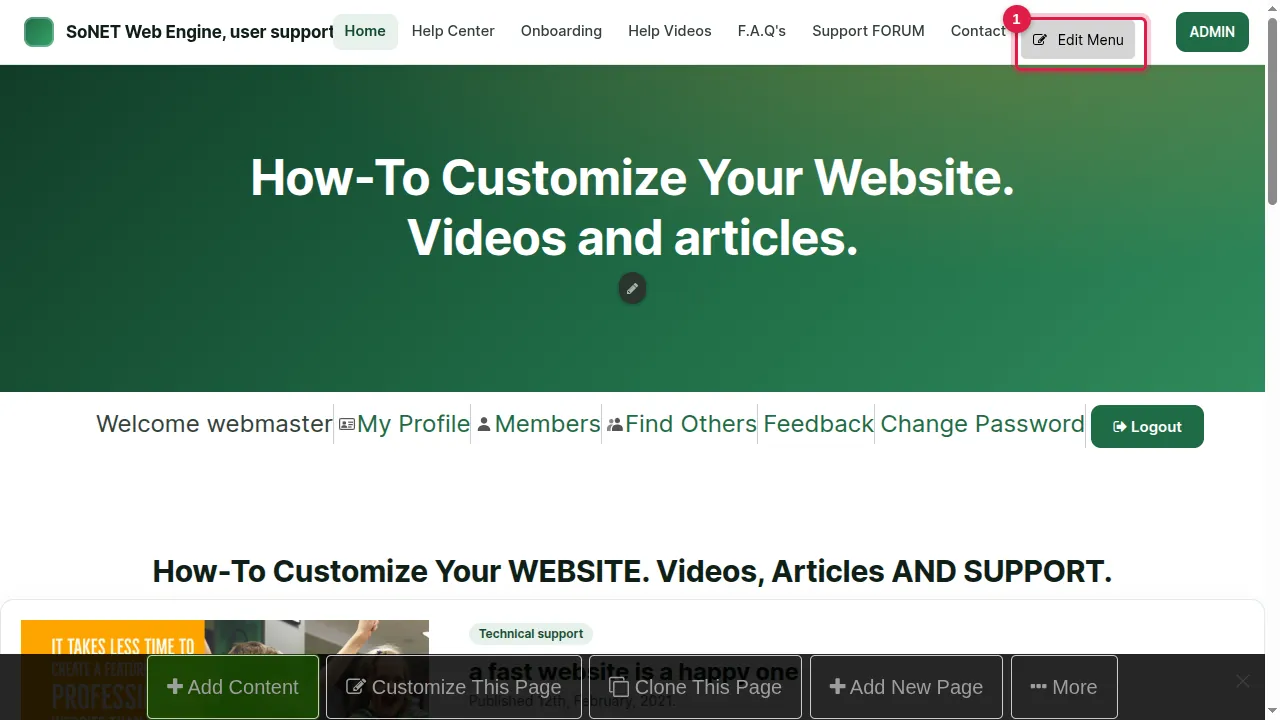
Step 1. Click Edit Menu, next to your menu. "Edit the menu" opens on its Items tab.
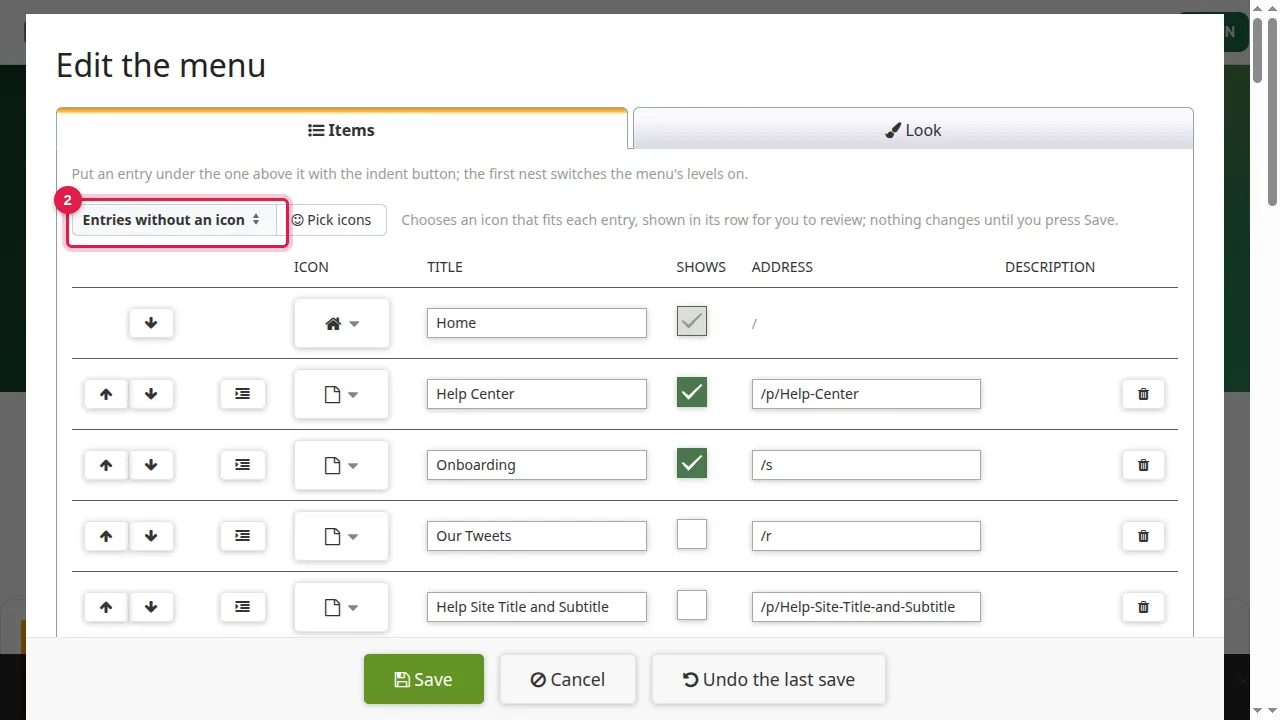
Step 2. Next to PICK ICONS, choose which entries should get an icon: "Entries without an icon" or "Every entry".
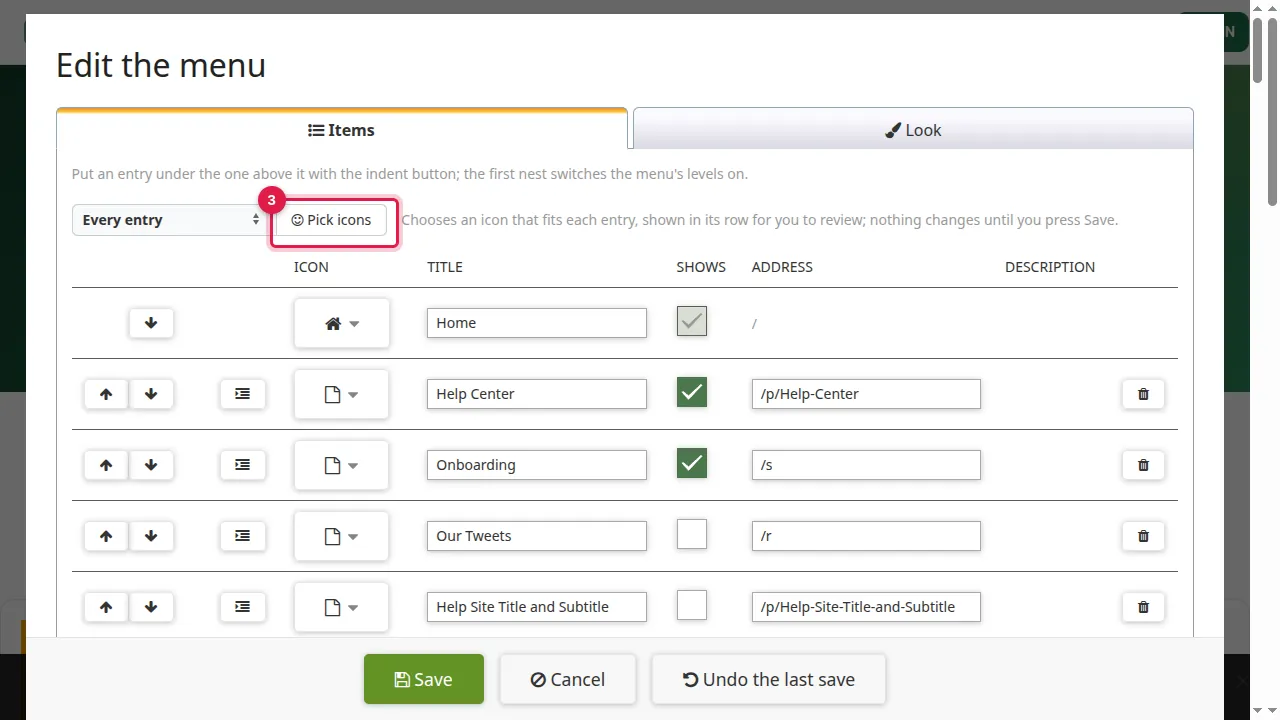
Step 3. Click PICK ICONS. The platform chooses an icon that fits each entry's title; this takes a few seconds.
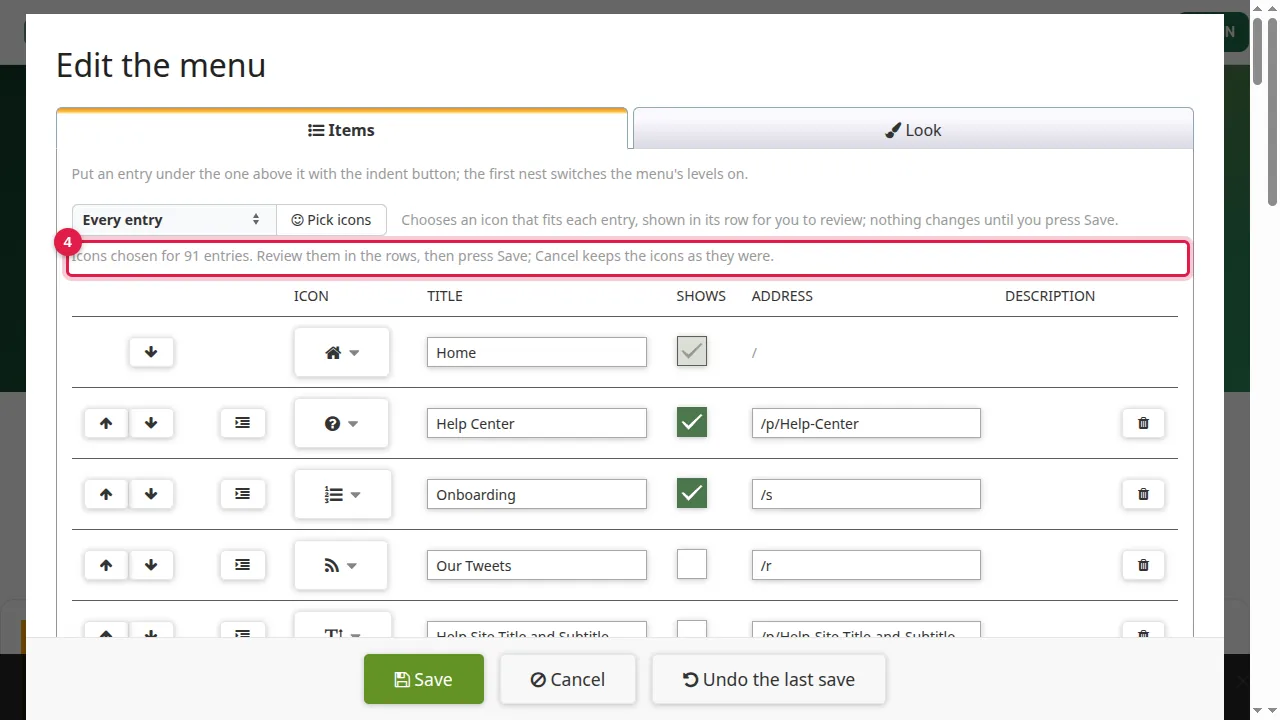
Step 4. When it is done, a line tells you how many entries got an icon. Nothing is saved yet.
Change one icon
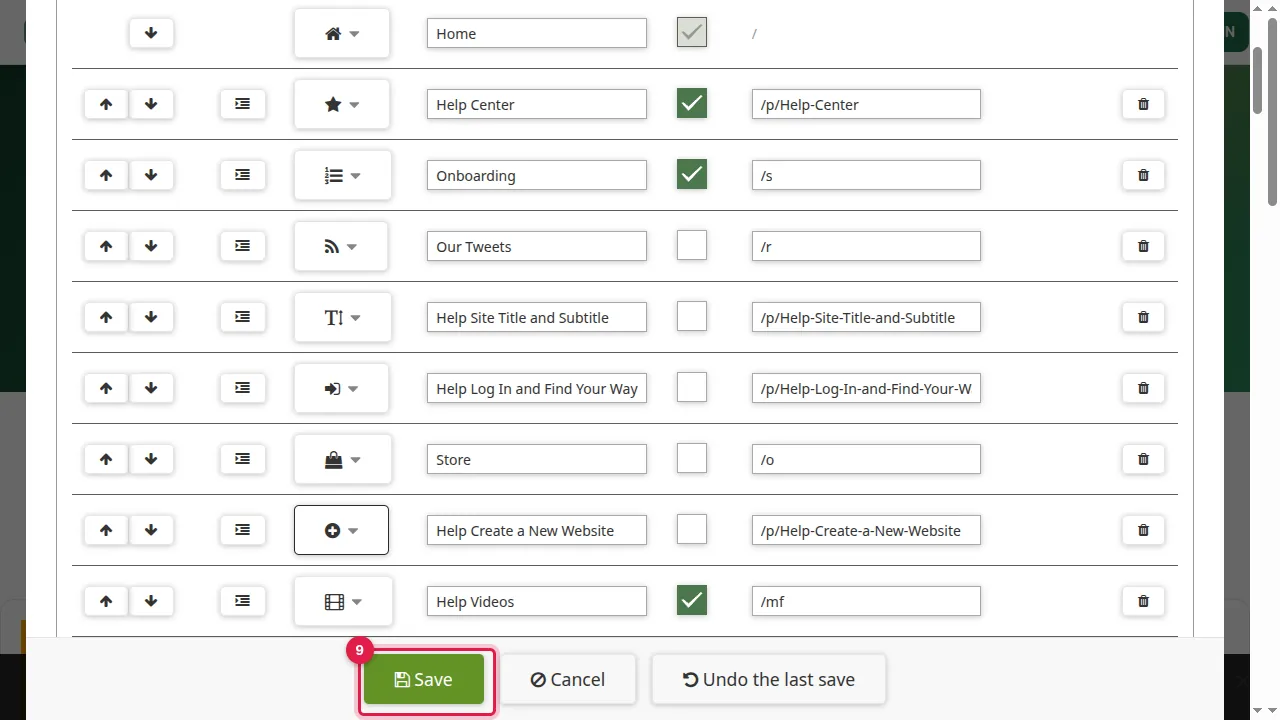
Step 5. Each row now shows its proposed icon. To change one, click it.
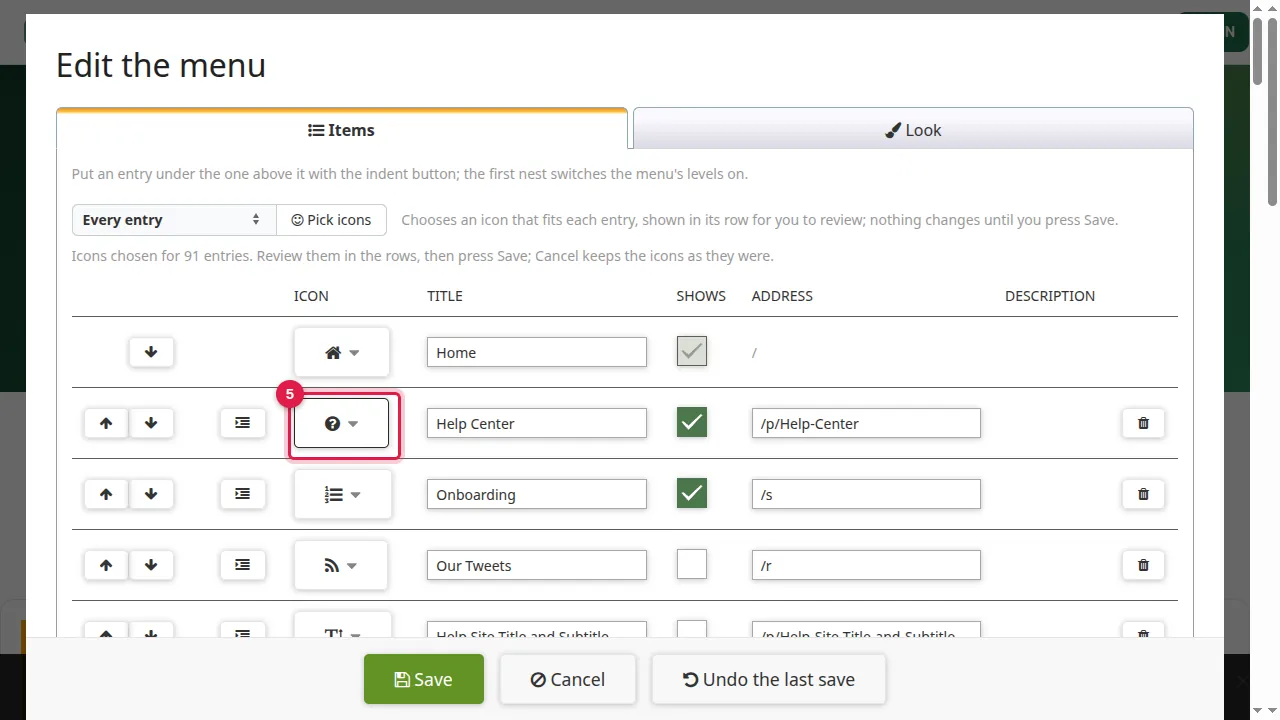
Step 6. "(no icon)" takes the icon away from that entry.
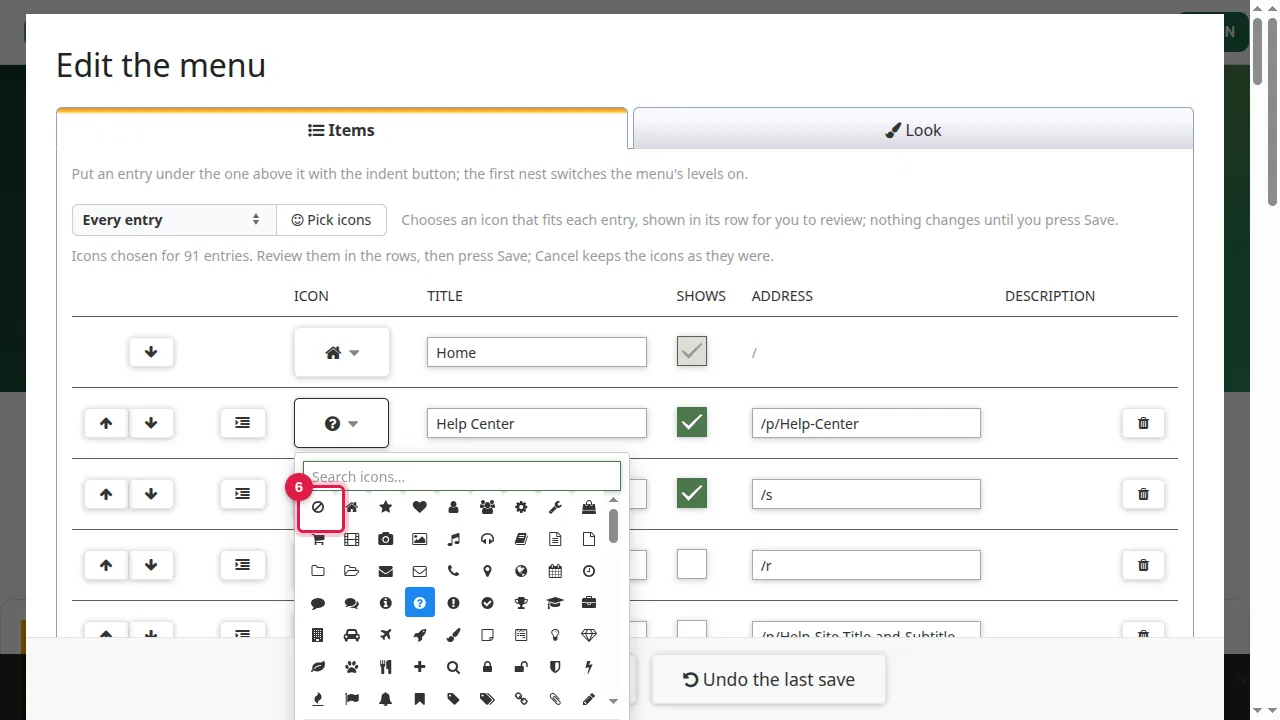
Step 7. Or type in the search box to find an icon by name.
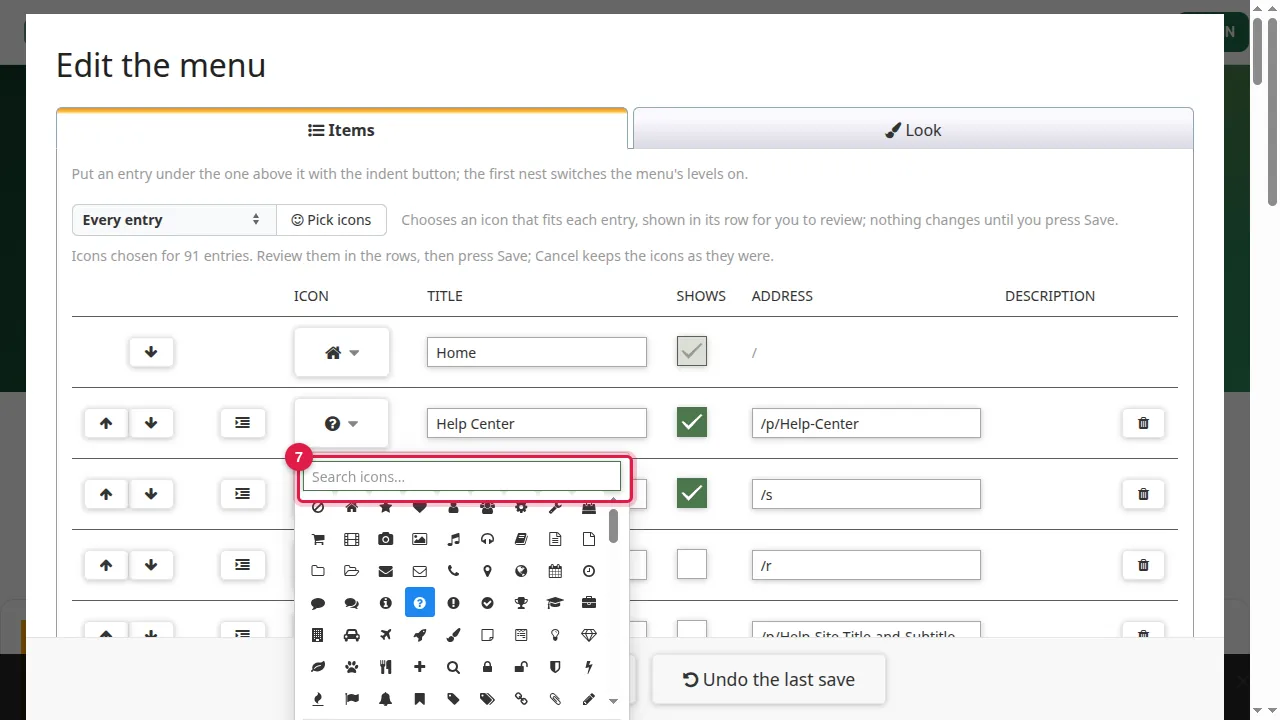
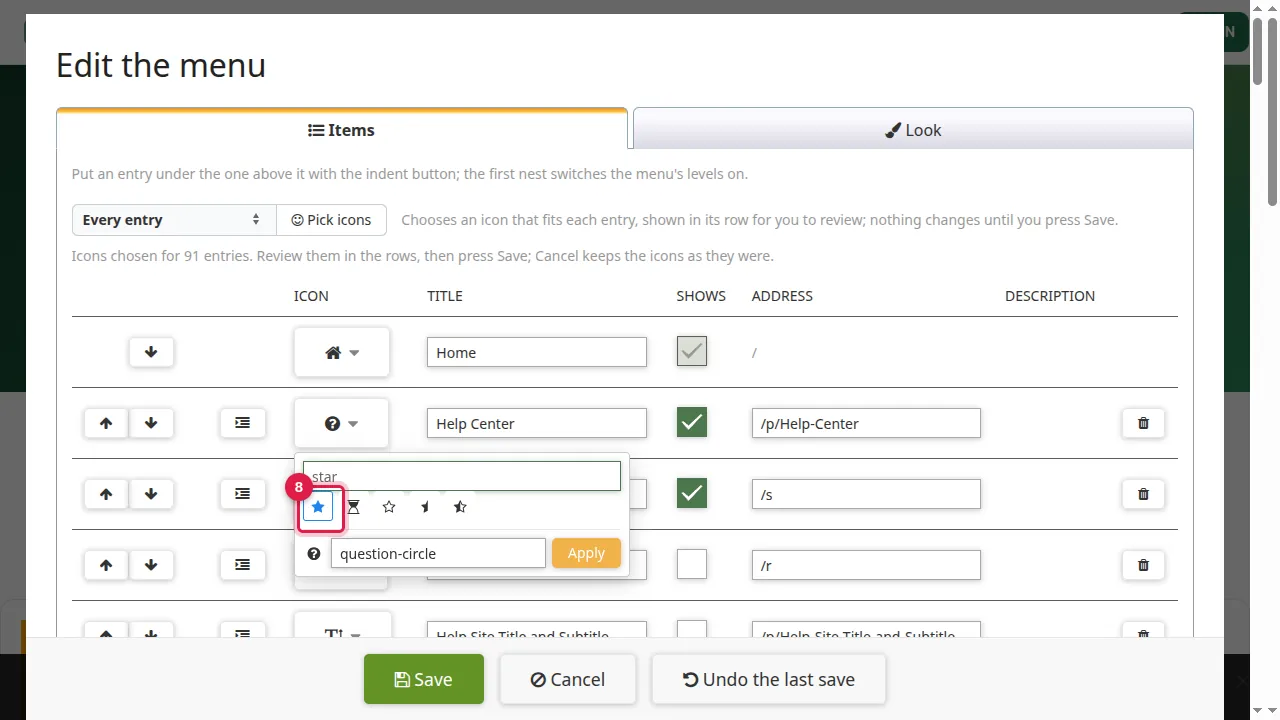
Step 8. Click the icon you want.
Save or cancel
Step 9. Click Save to keep the new icons.
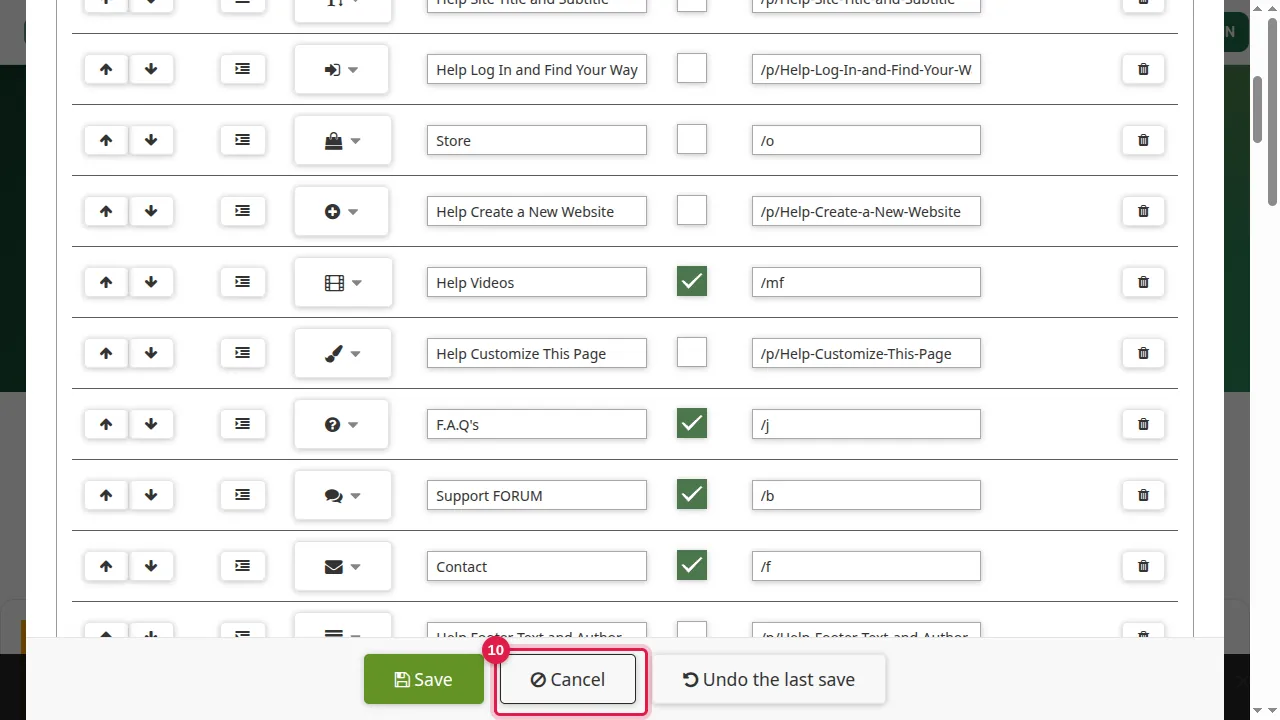
Step 10. Cancel closes the window and keeps the icons as they were. (In this demo we pressed Cancel.)
Check it worked
After saving, log out (or open a private window) and look at your menu: every entry shows its icon.
Good to know
- "Entries without an icon" leaves the icons you already chose alone; "Every entry" proposes a new icon for all of them.
- You can run PICK ICONS again as often as you like before you save.
Related help
Shown on the 2026 version of the SoNET Web Engine. Last checked 4 November 2026. Something different on your screen? Tell us through the Contact page.