Help Center Pages & Editing
Add a section from a description
Add content › From description writes a new section for your page from a sentence you type. You see a preview first, can create it again with another description, and only Add this section puts it on the page. Details it cannot know, like your opening hours or address, are left as placeholders in brackets for you to fill in.
Watch it done: a short silent video with captions · 0:52. The steps below show the same thing picture by picture.
Before you start
- Log in and open the page that should get the new section.
Describe the section
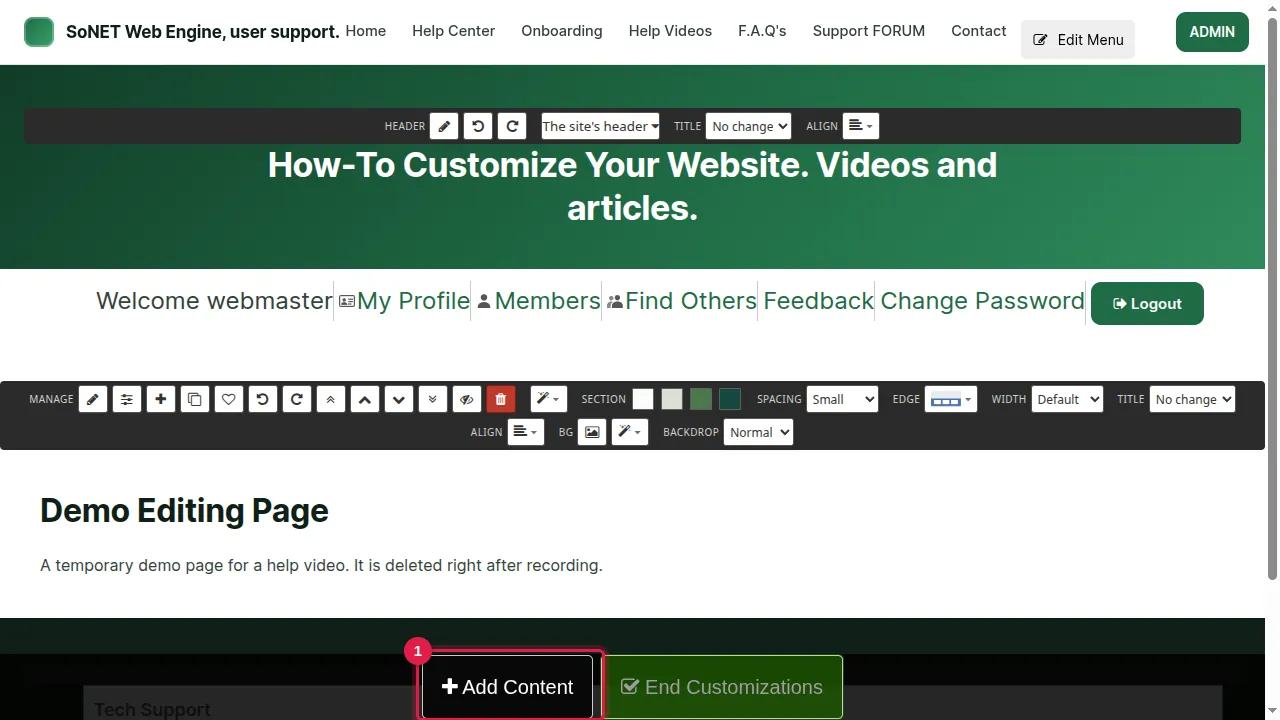
Step 1. Click Add Content in the bar at the bottom of the page.
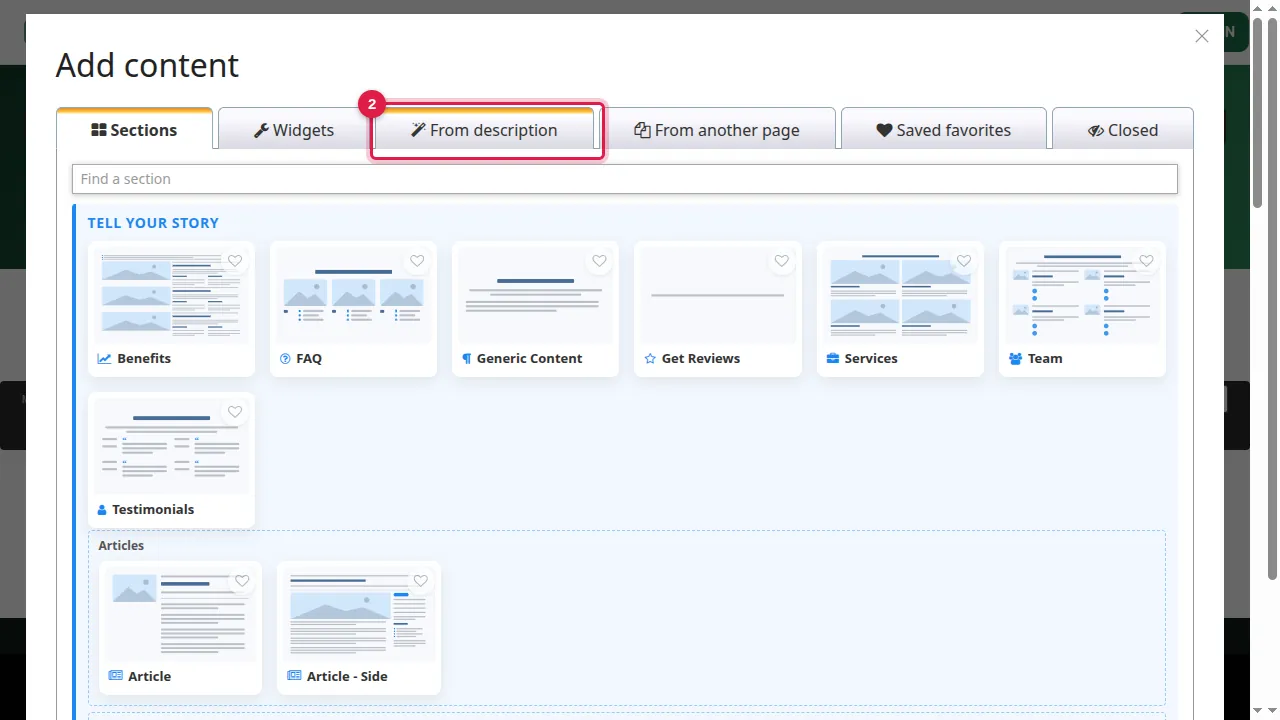
Step 2. Open the tab From description.
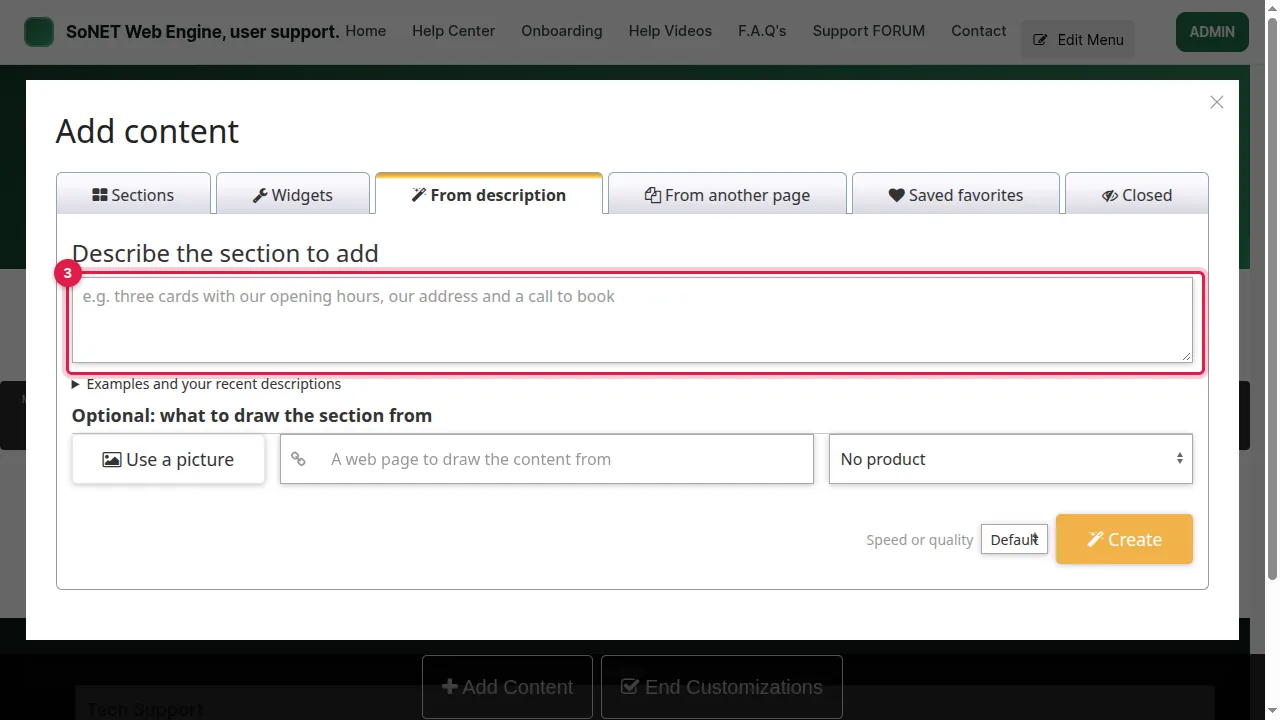
Step 3. Describe the section you want in a sentence, for example "Three cards with our opening hours, our address and a button to book a visit". "Examples and your recent descriptions" below the box gives you ideas.
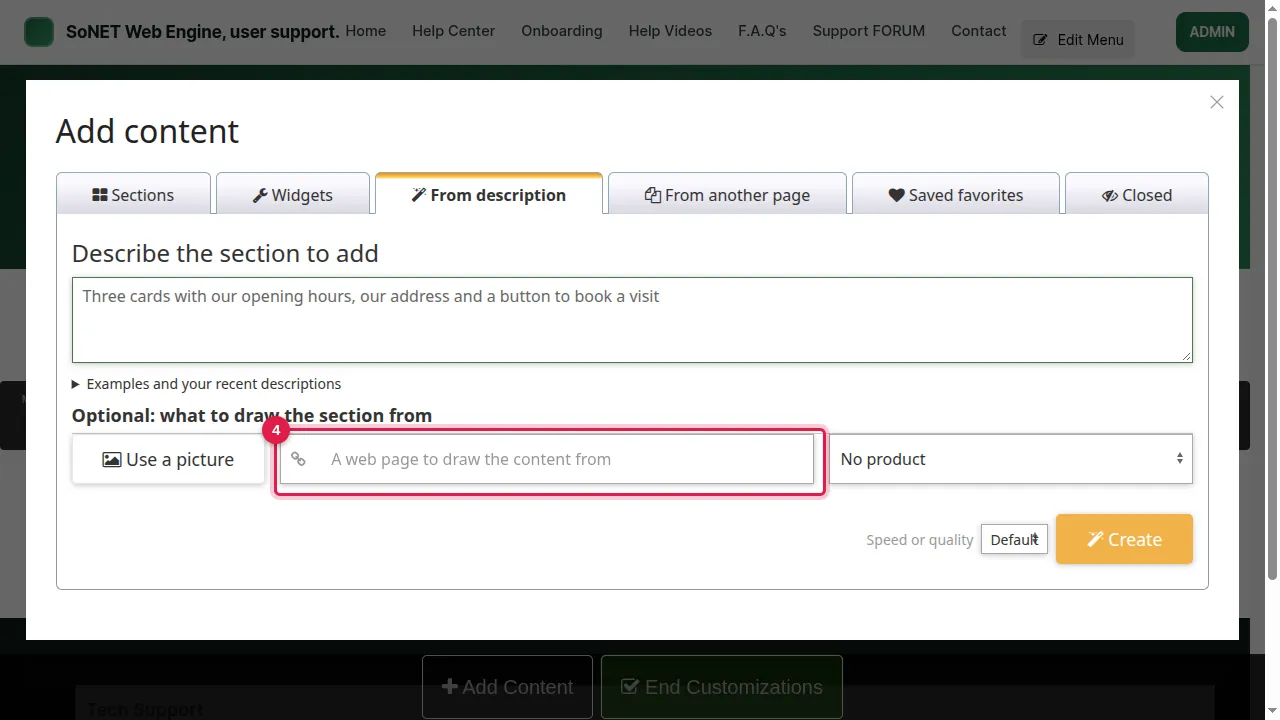
Step 4. Optional: under "what to draw the section from" you can use a picture, type the address of a web page, or pick one of your store's products. Next to Create, "Speed or quality" offers Default, Speed or Quality.
Preview and add it
Step 5. Click Create. The window says "Writing the section…"; after about 10 seconds a preview appears in the window.
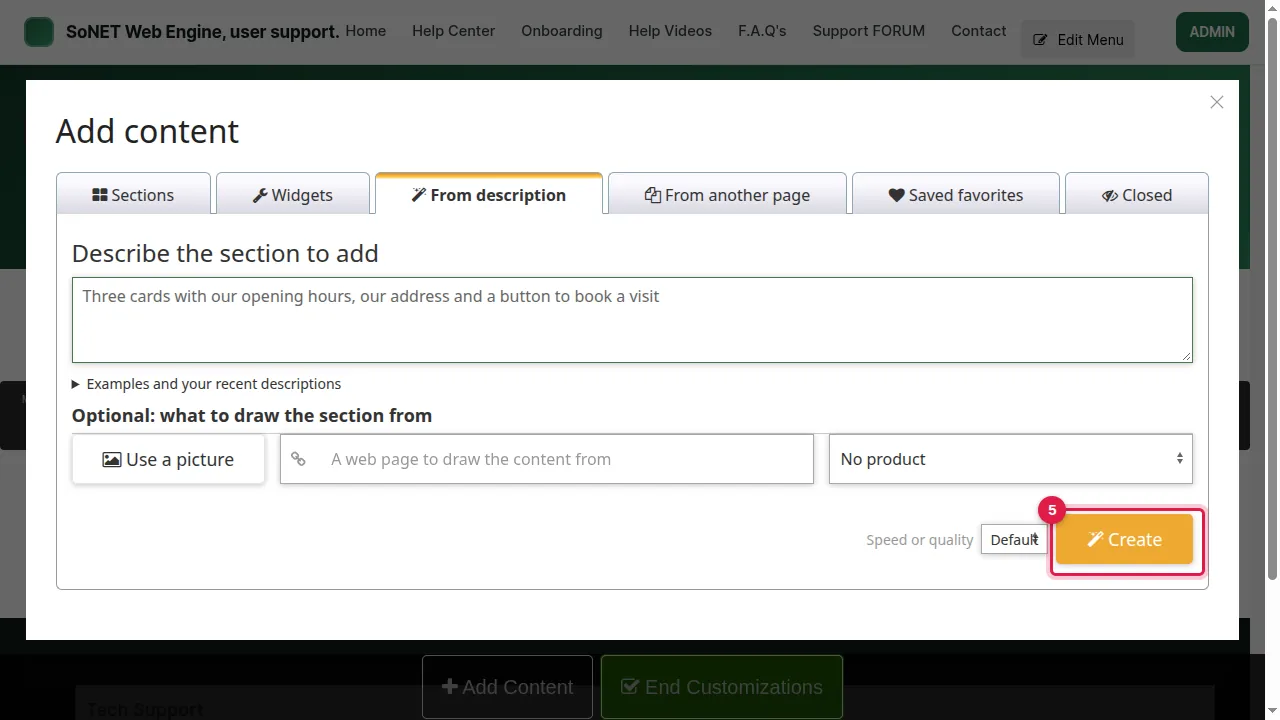
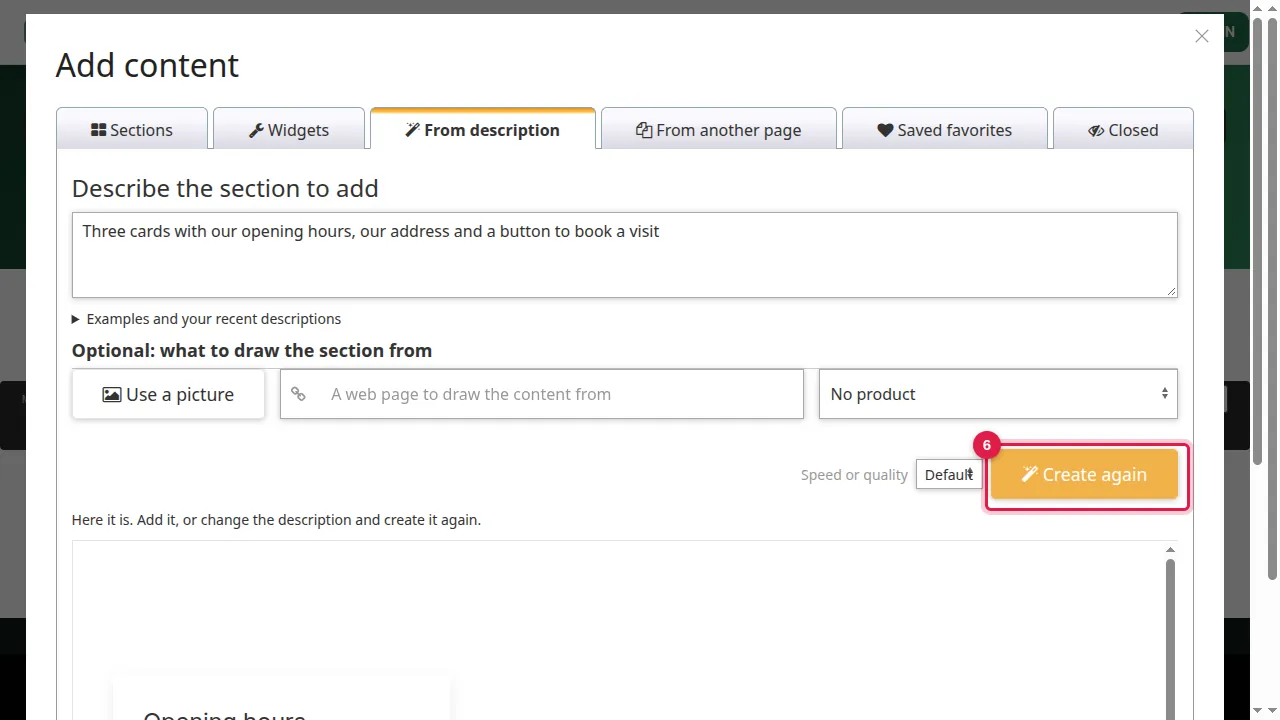
Step 6. "Here it is. Add it, or change the description and create it again." Not right? Change the description and click Create again.
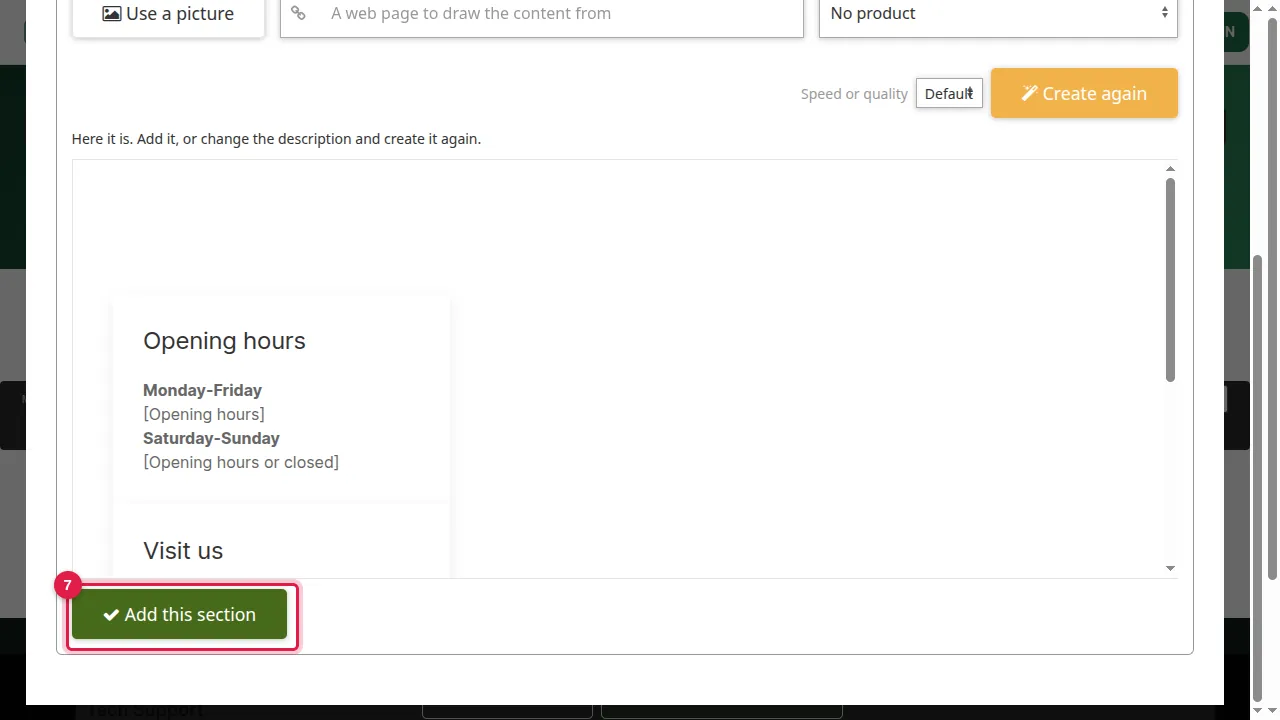
Step 7. Happy with it? Click Add this section. Nothing is added to the page before you do.
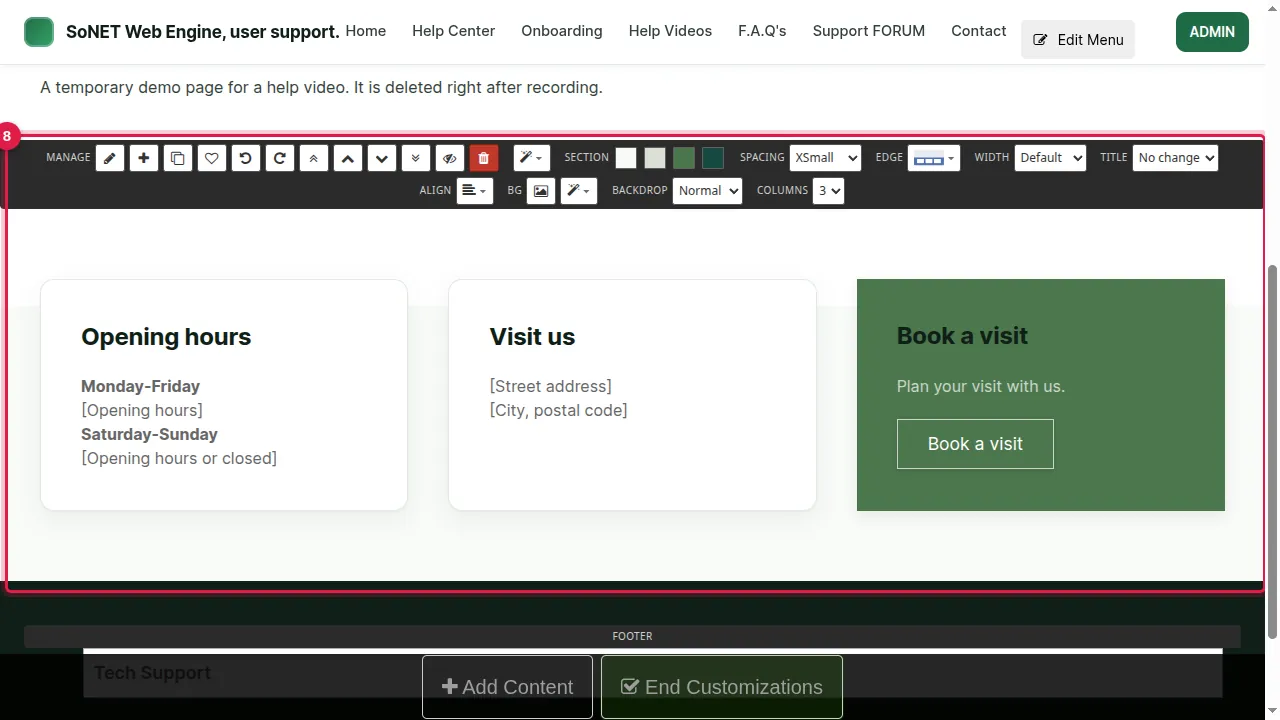
Step 8. The section is added at the bottom of the page. Details the platform cannot know, like your opening hours or street address, are left in brackets: replace them with your own. Also check where its buttons link (here "Book a visit"): click the section's pencil, then the button, and set its link.
Check it worked
Look at the page as a visitor (log out or use a private window): the new section shows your own details, with no brackets left.
Good to know
- Be specific: say what the section should hold (cards, a list, a button) and what it is about.
- Move the new section with the arrows in its toolbar, or change it with its pencil like any other section.
Related help
Shown on the 2026 version of the SoNET Web Engine. Last checked 5 November 2026. Something different on your screen? Tell us through the Contact page.